
Let's build an image classification app with local Visual Language Models (VLMs)
Let's start simple

Today we start an N-part series on how to build and deploy image classifiers to phone devices, using local Visual Language Models.
You can find all the source code in this open-source repository.
Give it a star on Github ⭐ if you get value from it
But, before we start…
What is a Visual Language Model?
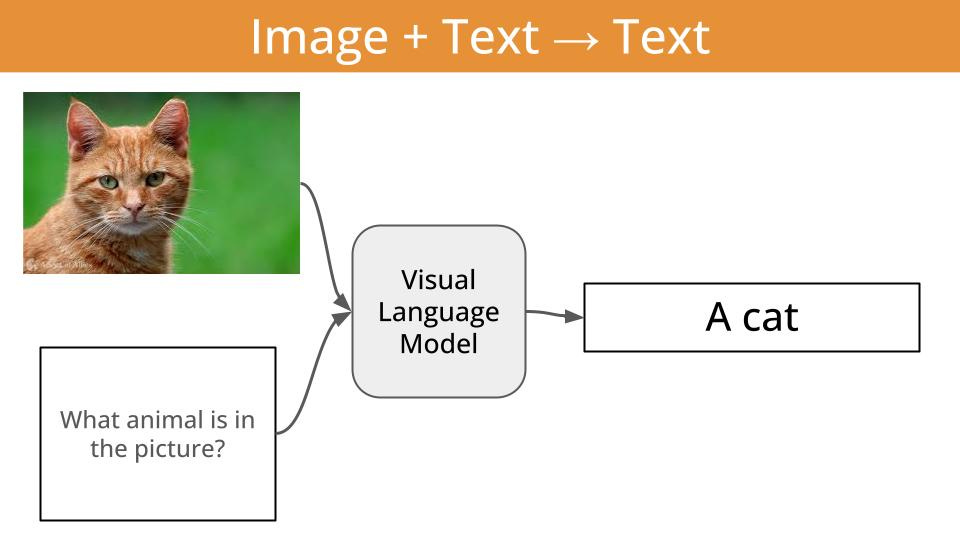
A visual language model (aka VLM) is just a function that given
an image, and
a piece of text (aka the prompt)
outputs
another piece of text.
In other words, a VLM is a function that can transform visual information (e.g. images or videos) into textual information.
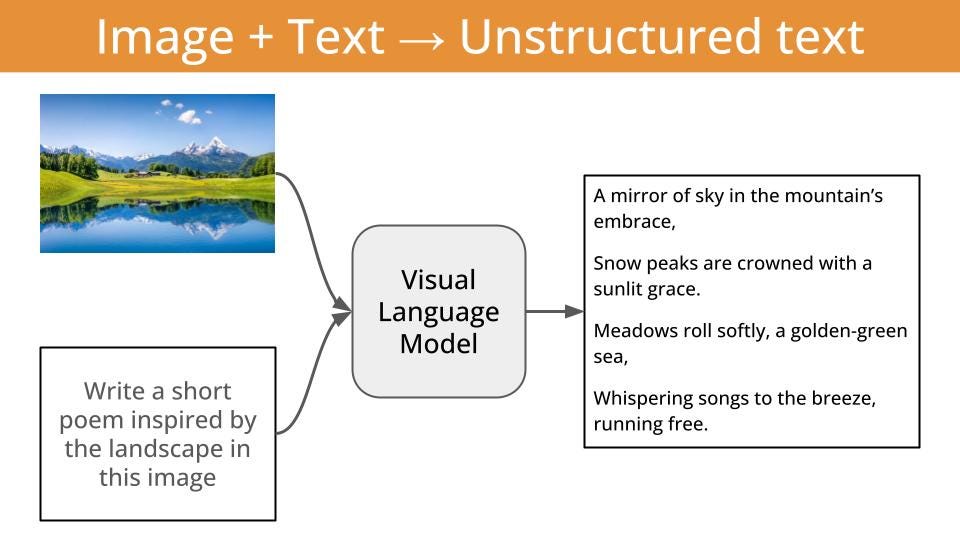
And the thing is, this textual output can be either
unstructured and beautiful English/Chinese/Spanish/or-whatever-other-language-you-like

or (even better)
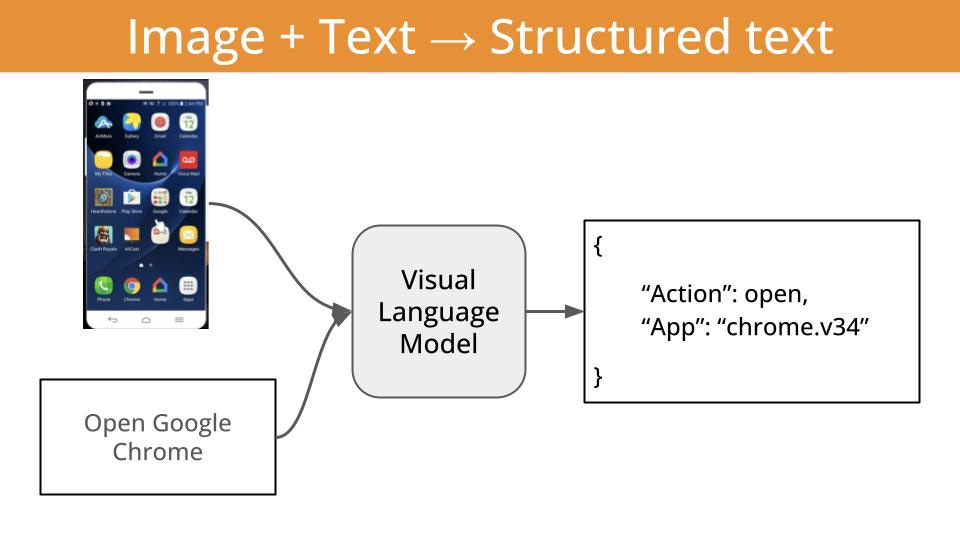
structured output, like tool calls, that can guide killer apps like local agentic workflows. This is in my opinion, the most impactful application of VLMs at the moment.

What will we cover today and in the following N-weeks?
We will start with image classification, a classic problem in Computer Vision with tons of real-world applications.
We will use
a sequence of increasingly complex classification tasks, to uncover step-by-step how to build specialised image classification systems, tailored to your specific use case.
the LFM2-VL family of open-weight Visual Language Models (aka VLMs) by Liquid AI to classify images for these tasks.
the Leap Edge SDK for iOS to deploy the final models into an iOS app.
Each of the tasks in this series will be progressively more complex, and will require us to build a more specialized image classifier.
Once we have the models ready, I will show you how to deploy them into an iOS app. Because, at the end of the day, most developers in this world trying to build features and apps using AI do not care about models. They care about functions.
For example, a cat vs dog classifier in Swift is a function that looks like this:
enum AnimalClassification: String, CaseIterable {
    case dog = “dog”
    case cat = “cat”
}

func classify(image: UIImage) async -> AnimalClassification {
    // TODO: Add actual classification logic here
    // For now, return a random classification
    return AnimalClassification.allCases.randomElement() ?? .dog
}
Why image classification?
Image classification is a fundamental task in computer vision, that has tons of real-word applications, especially when deployed on edge devices that do not require internet access. For example:
Self-driving cars use edge-deployed models to classify pedestrians, vehicles, traffic signs, and road obstacles in real-time without relying on cloud connectivity for critical safety decisions.
Factory production lines employ edge vision systems to classify defective products, missing components, or assembly errors, enabling immediate rejection of faulty items.
Medical diagnostic imaging to classify skin lesions, detect fractures, or identify abnormalities, providing immediate diagnostic support without sharing confidential patient data.
Smart security cameras classify potential threats, recognize authorized personnel, and detect suspicious activities locally without sending video data to external servers.
Task 1 → Cats vs Dogs classifier
Asking a visual Language Model to classify an image either as a dog or a cat is an easy task, but it is a good way to get started.
The key learning I want you to get at this point is that you can produce a pretty decent image classifier with a strong VLM like LFM2-VL-450M, with just a bit of prompt engineering.
If you open the image-to-json directory, you will see these subfolders:
configs/→ YAML files that contain the evaluation parameters, including the VLM to use, the dataset to evaluate on, and the prompt to use.image-to-json/→ The Python code to evaluate (and soon fine-tune) a given VLM on a given dataset.Evaluation code is in the evaluate.py file, and uses Modal to run on GPU accelerated hardware.
evals/→ The evaluation reports generated by the evaluate.py script. You can inspect them using this jupyter notebook.
For example, if you open the configs/cats_vs_dogs_v0.yaml` file, you will see the following parameters:
# Ensures deterministic evaluation runs
seed: 23

# Model parameters
model: “LiquidAI/LFM2-VL-450M”
structured_generation: false

# Dataset parameters
dataset: “microsoft/cats_vs_dogs”
n_samples: 100
split: train
image_column: “image”
label_column: “labels”
label_mapping:
  0: “cat”
  1: “dog”

# Prompt parameters
system_prompt: |
  You are a veterinarian specialized in analyzing pictures of cats and dogs
  You excel at identifying the type of animal from a picture.

user_prompt: |
  What animal in the following list is the one you see in the picture?

  - cat
  - dog

  Provide your answer as a single animal from the list without any additional text.
To run an evaluation using this configuration, cd into the image-to-json directory and run the following command:
make evaluate CONFIG_FILE=cats_vs_dogs_v0.yamlIf you haven’t changed any of the parameters (including the `seed`) you should see the following output:
Accuracy: 0.97
✅ Evaluation completed successfully
Not bad, but still... distinguishing between cats and dogs is not that hard.
Where is the model failing?
Visualize the eval results
The evaluation script generates a CSV file with the
images encoded in base64,
predictions and
the ground truth labels
that is saved in the evals/ directory.
To visualize it, I created the jupyter notebook at notebooks/visualize_evals.ipynb. You can open it by running the following command:
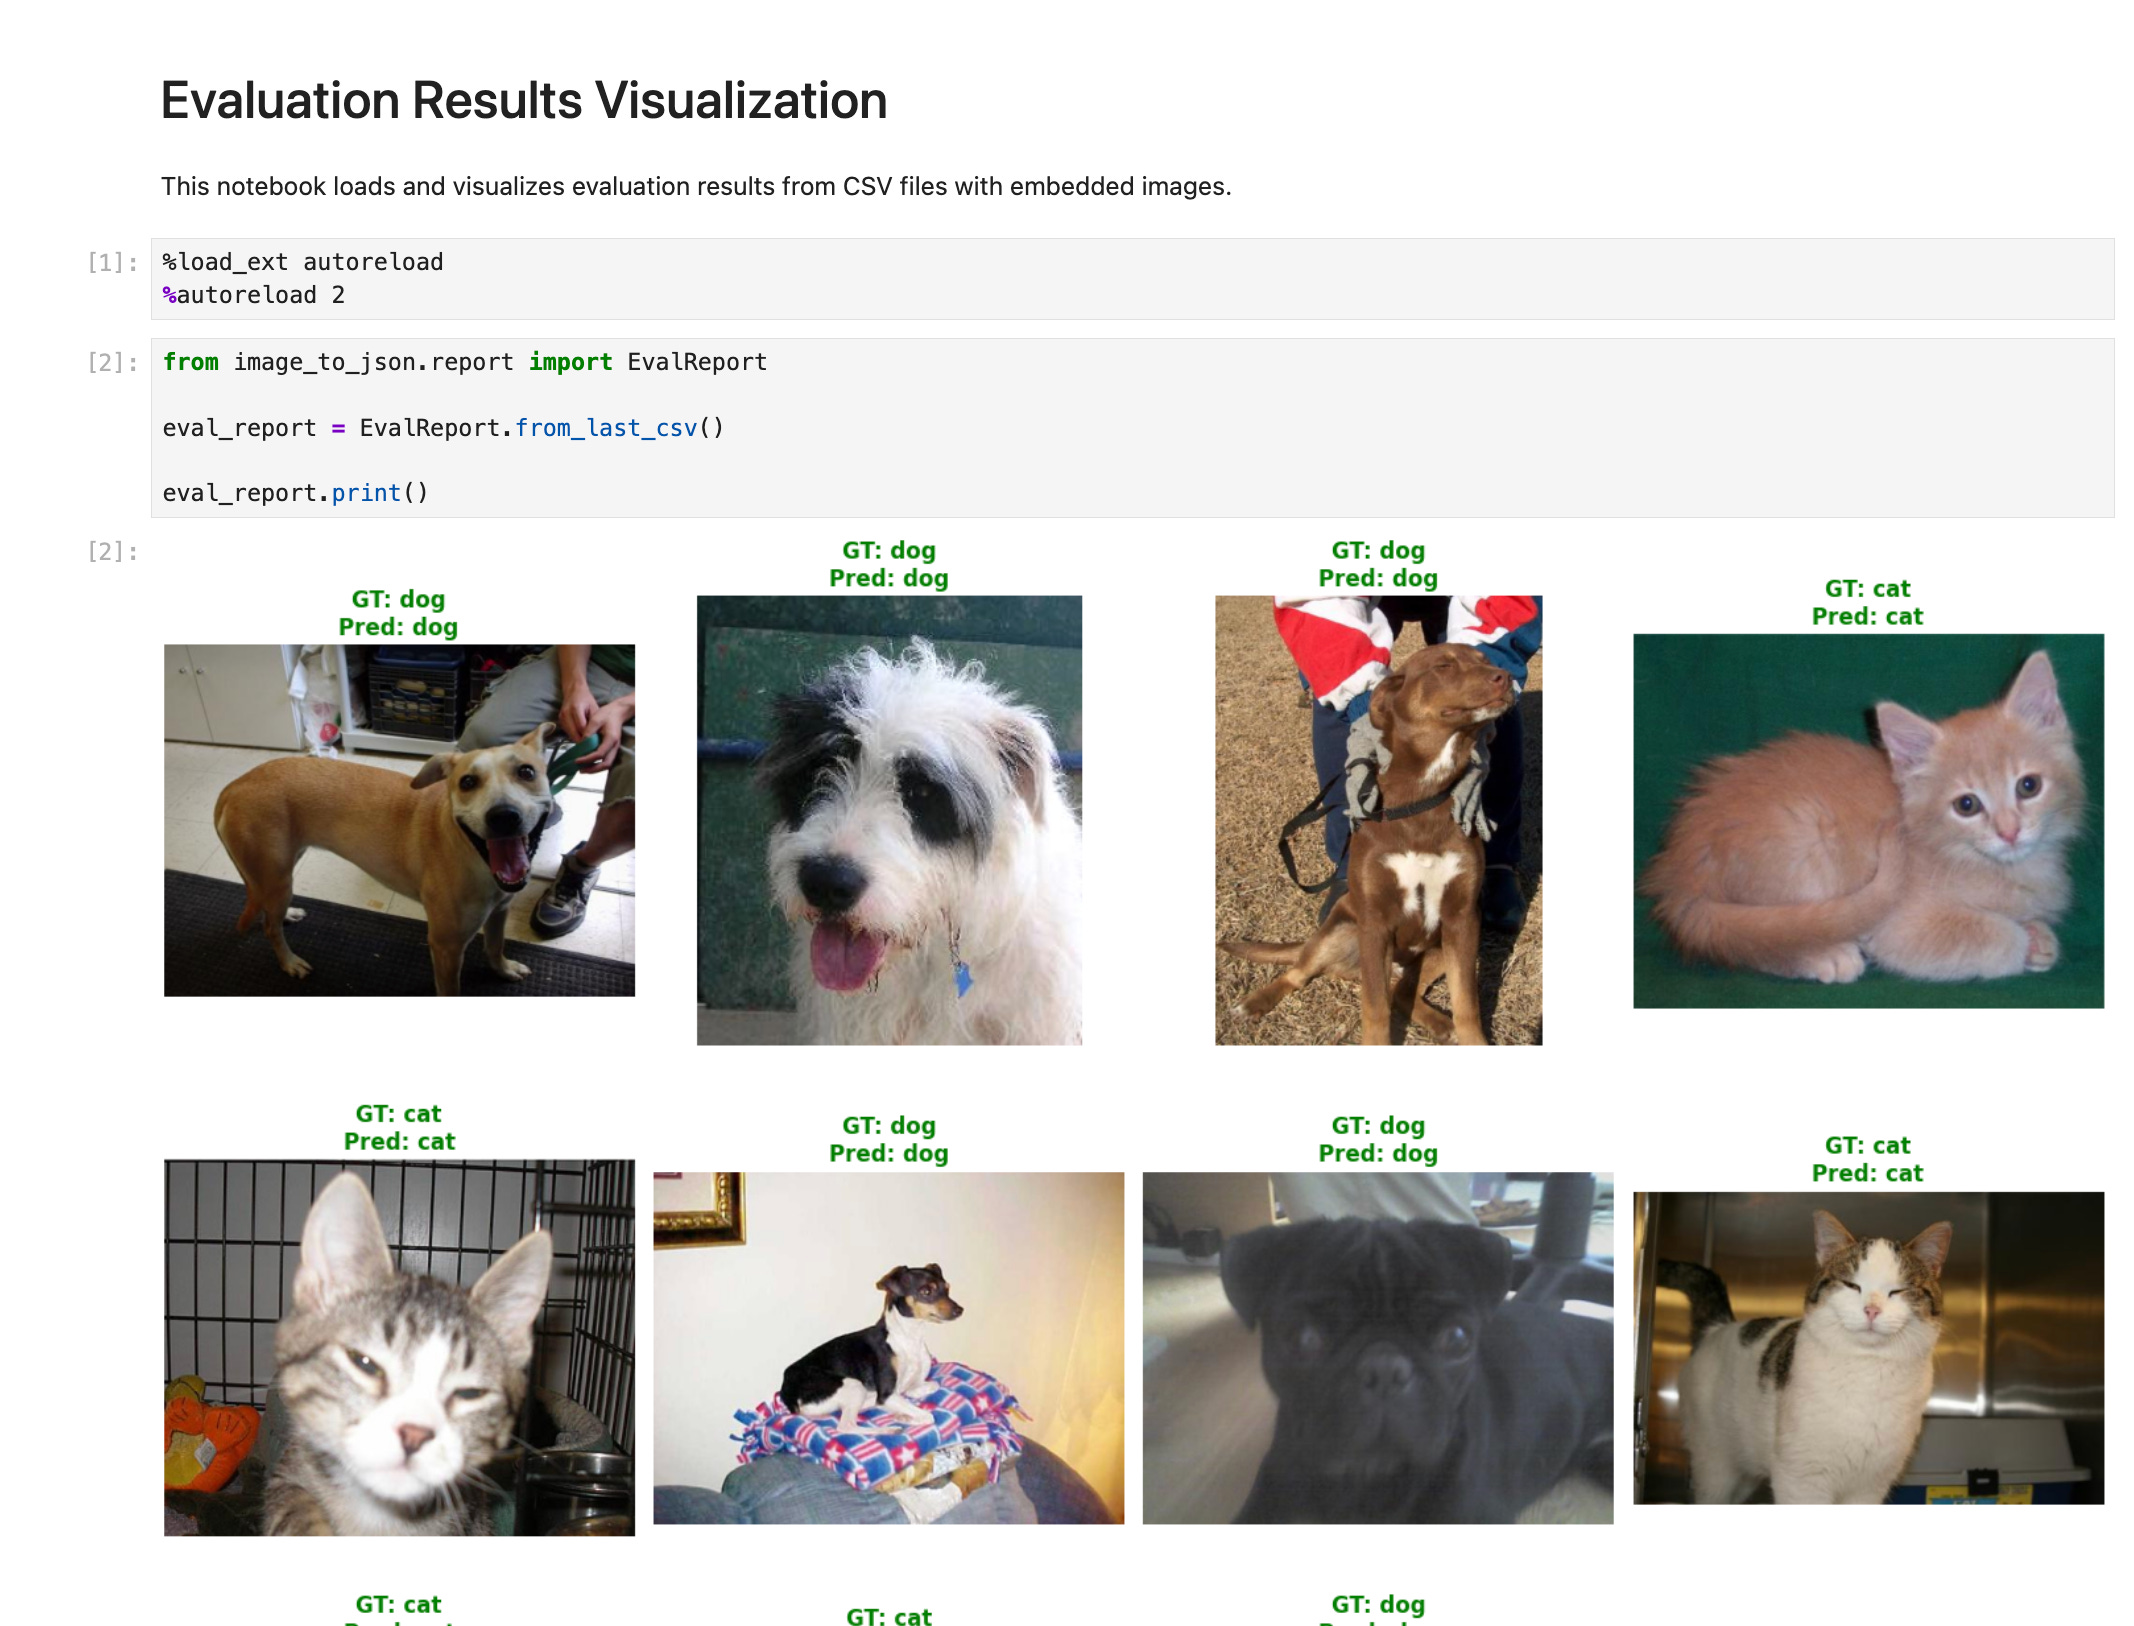
uv run jupyter notebook notebooks/visualize_evals.ipynbThe output shows each of the images in the evaluation run (100 in this case), and the ground truth and predicted labels on the top of each image.
Green denotes correct predictions, red denotes incorrect predictions.
To visualize the 3 misclassified samples, you can run the following cell:
eval_report.print(only_misclassified=True)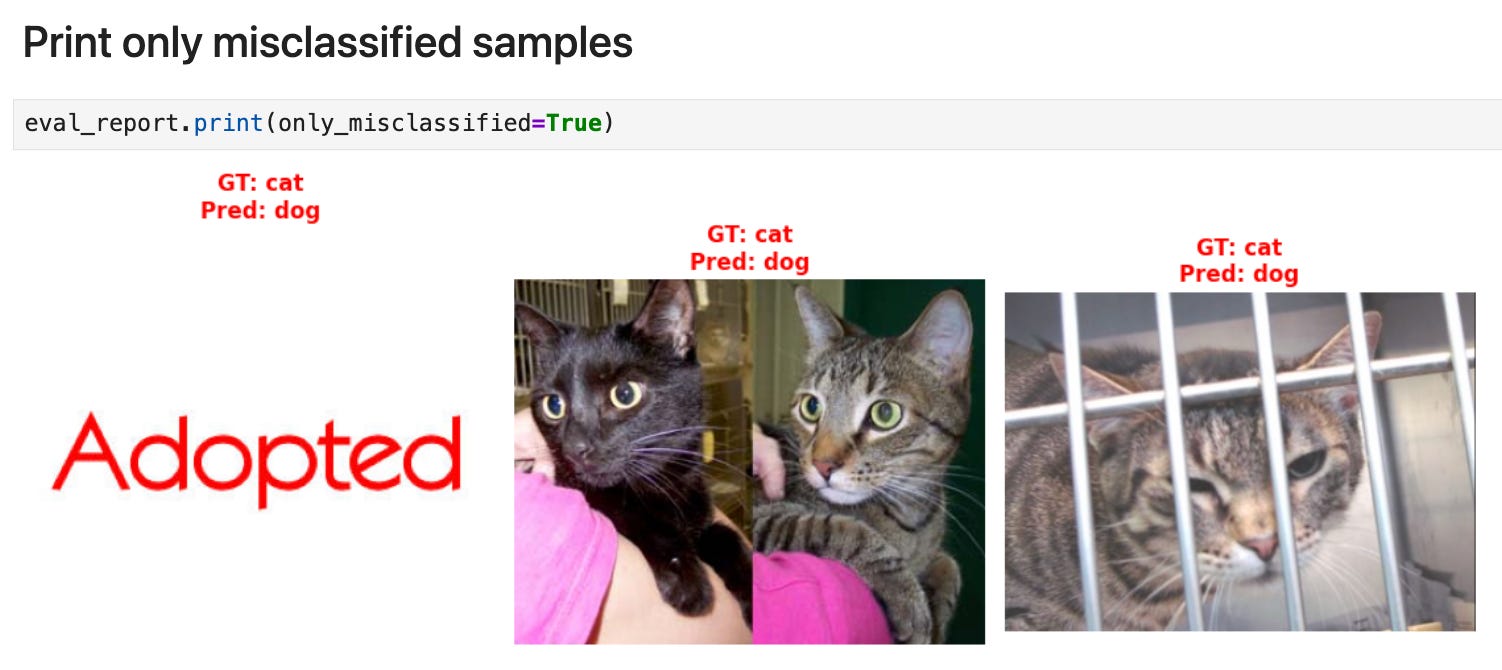
The first sample is not a model failure, but a dataset failure. The second and third are model failures.
Tip
I highly recommend you do this kind of sample-by-sample analysis when you are trying to understand why a model is not performing well. It ofen reveals problems you were not aware of, like finding the “Adopted” text from above in our cats vs dogs dataset.
At this point, you have 2 options:
Option 1 → You remove the first misclassified sample from the dataset (the one with the word “Adopted”) as it does not belong neither to the “cat” or “dog” classes.
Option 2 → Keep the misclassified sample and add a new class to your classification problem, like “other”. In this case, your model is a 3-class classifier that can output either “cat”, “dog” or “other”.
Option 2 will produce a more robust model, that won’t produce non-sense responses when the picture shown to it has nothing to do with a cat or a dog.
However, as I am bit short on time today, I will stick to Option 1, and just drop the first misclassified sample from the dataset.
Now...
What about the second and third misclassified samples?

At this point, there are at least 3 ways to proceed:
Option 1 → Use a more powerful VLM.
For example, instead of using LFM2-VL-450M, you can use LFM2-VL-1.6B.
This is a valid option if the device where you will deploy the model is powerful enough to handle the larger model. Otherwise, you will need to try options 2 or 3.
Option 2 → Improve your prompt.
For example, you can try a prompt that can handle situations in which there are 2 cats instead of 1, which is an edge case that fools our current model.
There are also automatic ways to optimize prompts, using a library like DSPy and a technique like MIPROv2. Check this tutorial for an example.Option 3 → Fine-tune the model. This is a more computationally expensive option, as it involves both a forward and a backward pass through the model, but tends to give the best results. This is the option we will use for the Human Recognition, and Card bran/model/year detection tasks.
For the time being, let’s see if LFM2-VL-1.6B can handle the second and third misclassified samples.
From the command line, run:
make evaluate CONFIG_FILE=cats_vs_dogs_v1.yamland you will get the following output:
Accuracy: 0.99
✅ Evaluation completed successfully
Which means that now only 1 out of the 100 samples is misclassified.
If you re-run the notebook, you will see what went wrong.
The model just came up with a new label: “pug” !!!
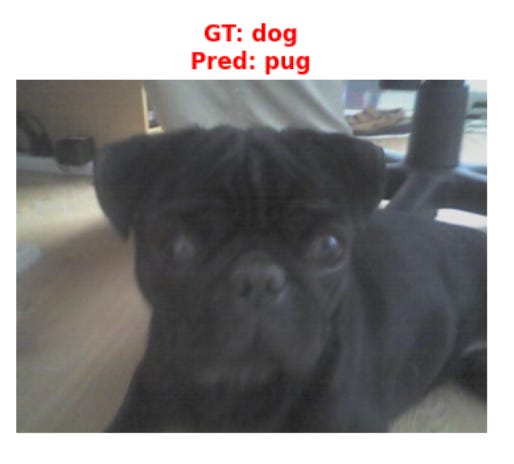
Even though we said to the Language Model in the prompt that the image was either a cat or a dog, there is no guarantee that it will only output those two labels.
We have just seen this kind of behaviour, and you will see it again and again when you try to get the model to output a specific format.
Fortunately, there are libraries that can help us fix this problem.
But this is something we will cover next week.
You can find all the source code in this open-source repository.
Give it a star on Github ⭐ if you get value from it
Talk to you next week,
Pau