Let’s go step-by-step through the deployment workflow of a real-world ML REST API, following MLOps best practices.
👉🏽 Subscribe to the Real-World ML Youtube channel for more free lectures like this
The starting point
Imagine today is your first day as an ML engineer at Uber, and your task is to improve the ML service that predicts the Estimated Time of Arrival (ETA). The ETA service gives the end users an estimate of when the driver will arrive at the pickup location.
As a starter, you talk to data engineers in the team, check how the current model works and what features uses. After that, you get your hands-dirty and
prepare training data,
train an ML model,
plot a few evaluation metrics, and
store the final model artifact as a pickle in your local drive.
You are happy with the results, so you think it would be a good idea to deploy the model to production.
The question is: HOW?
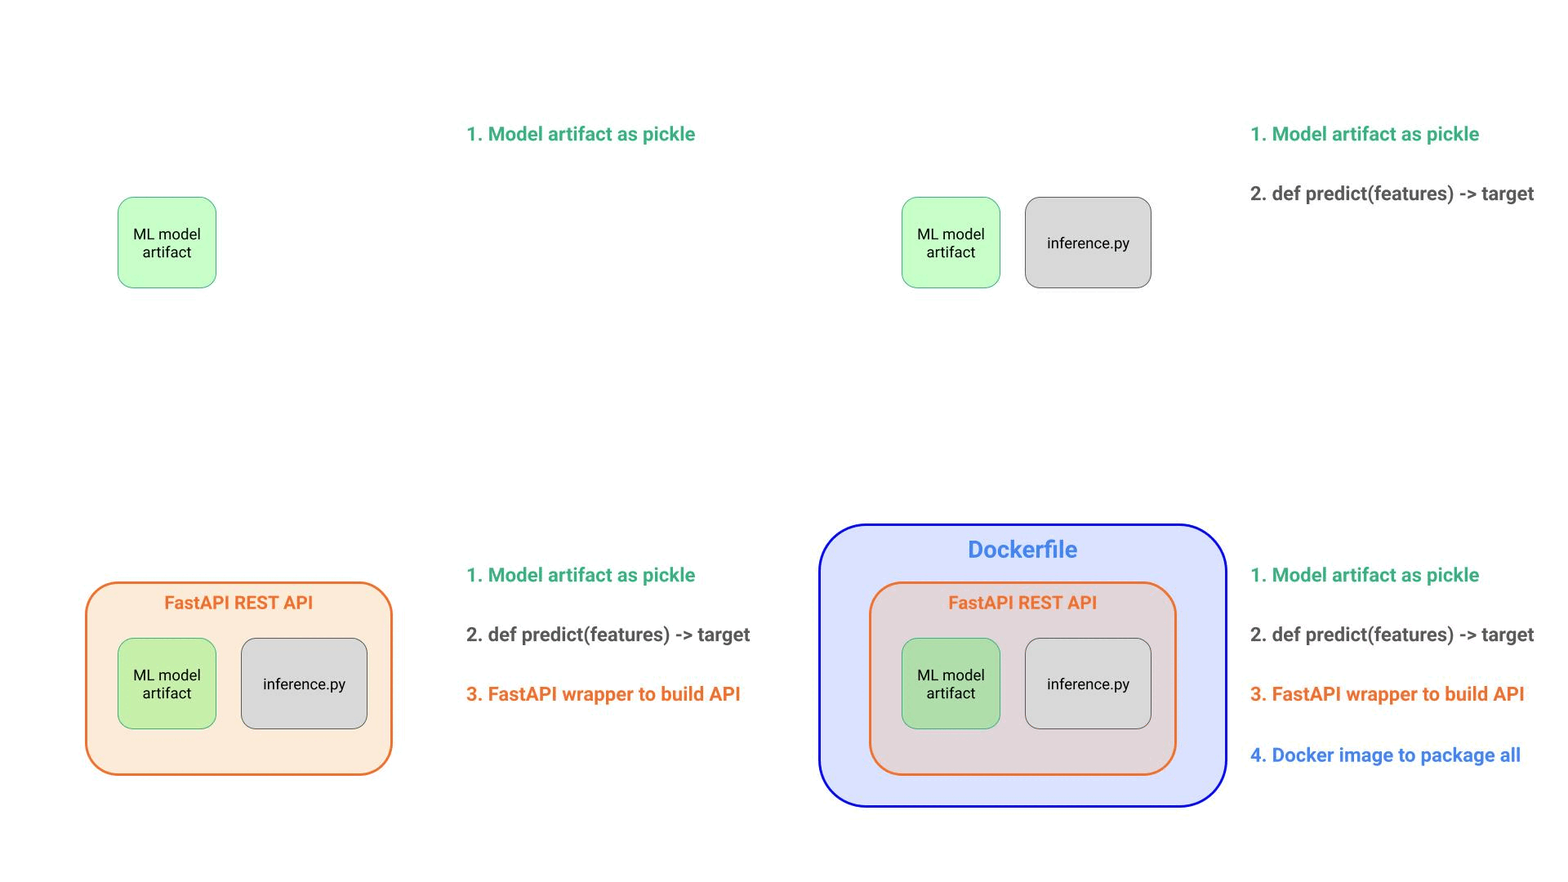
From model prototypes to REST APIs
So far you have
the model artifact you saved locally to disk, and
an inference.py script with a predict function, that
loads the model artifact,
transform raw features into model features, with the necessary pre-processing steps,
passes these final features to the model to generate predictions, and
returns these predictions
And if you have some experience with Docker, you can also go 2 steps further and write
A FastAPI or Flask wrapper around your Python code, to build the REST API, and
A Dockerfile to package all the dependencies your code needs in an isolated box, that can be easily deployed to any compute engine.
This is all fantastic. You can easily spin up this container locally, and everything works like a charm.
However, as long as you don’t deploy this container to a production REST API, you will generate 0 business value for the company.
So the question is,
How can I deploy this container as a production ready REST API?
The MLOps way
MLOps is a set of best practices and workflows that, among other things, help you move ML prototypes to production environments (aka deployments) safely.
What does the workflow look like in this case?
Let’s go step by step.
Step 1 → Push code to new branch and open Pull Request (PR)
The first thing is to use git and Github/Gitlab to track code changes. I recommend you develop your code in a non-master branch, that you can name as you wish. For example.
# Create new branch
$ git checkout -b new_eta_model

# Do work....

# Commit changes to local branch
$ git add .
$ git commit -m 'Initial commit'
Once you are happy with the results, you push the code to the remote repository on Github/Gitlab
$ git pushand open a pull request to merge your changes to the master branch.
Why not merge directly to master branch?
The master branch contains the exact code version that is deployed currently in the ETA REST API.
So, before merging to master, it is necessary to check that your new model is actually better than the one in master, that is currently running in production.
This is precisely what the Continuous Integration pipeline does.
Step 2 → Continuous Integration (CI)
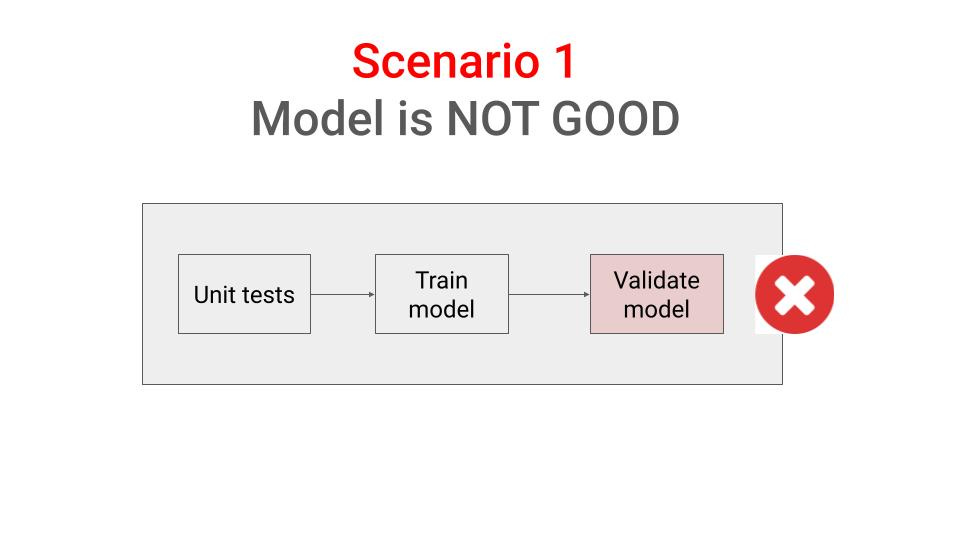
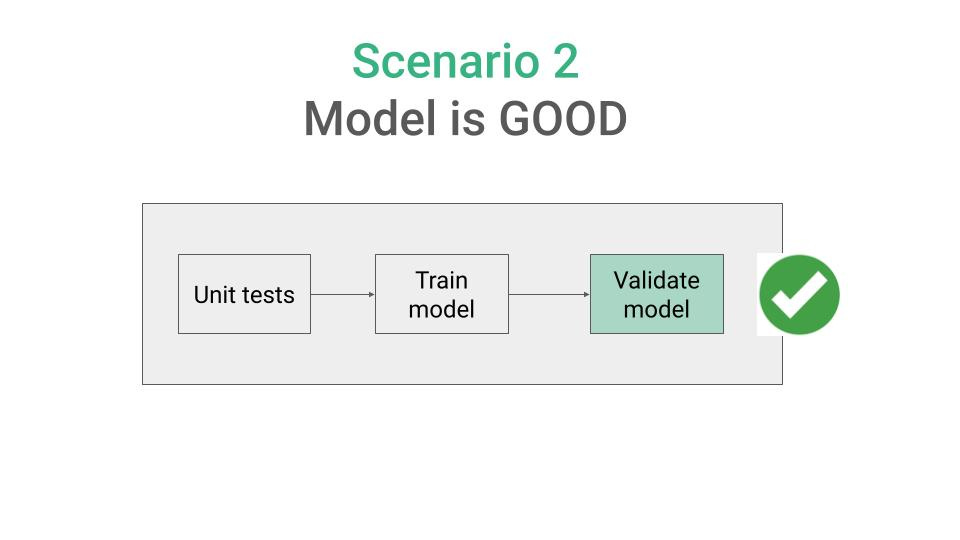
The Continuous Integration (CI) pipeline is a github action that is triggered automatically every time you open a Pull Request. The end goal is to make sure that your new code version, and model artifact are actually good and deserve to be promoted to production.
In this case, our github action does the following:
Run unit tests, for example, to make sure you feature engineering functions work as expected. For that, you can use a library like pytest.
Runs the training script from your “new_eta_model” branch and generates the model artifact.
Validates the ML model performance and possible biases, using a library like Giskard.
At the end, the pipeline checks can either
→ fail, so you need to work further on your code, or move to another project with higher priority, or
→ pass, so your model is ready to be deployed. In this case,
the CI pipeline pushes the model to your model registry, from where it can later be deployed, and
your branch “my_new_model” gets merged to master.
What is a model registry?
A model registry is a repository used to store and version your team’s ML models. It helps you and your team track models as they move from development to production.
If you haven’t used any before, I suggest you use a serverless one, like CometML. It is free and fully managed, so you do not need to spend time setting up and monitoring infrastructure.
Step 3 → Continuous Deployment (CD)
The Continuos Deployment (CD) pipeline is another github action that is triggered automatically after successful completion of the CI pipeline.
The role of the CD pipeline is to deploy the Dockerfile you wrote as a production ready API endpoint, that the rest of the services inside Uber infrastructure can call to request predictions.
In this case, our github action
Pushes the Docker image to Uber’s docker registry,
Triggers the deployment to your compute platform, for example
Kubernetes, using manifest files and
kubectl apply -fAWS Lambda, using the AWS CLI, or
Serverless platforms, like Beam, Cerebrium or Modal, that do not require Docker images at all.
Bonus 1 → Integration testing in Staging
ML systems are way more than just the ML artifact you generated. So, to test your ML end-to-end it is best practice to actually deploy it in a non-production environment, often called Staging, where you can send requests and log any relevant metric, including:
response accuracy,
latency, if it is critical for your use case
Bonus 2 → Testing in Production
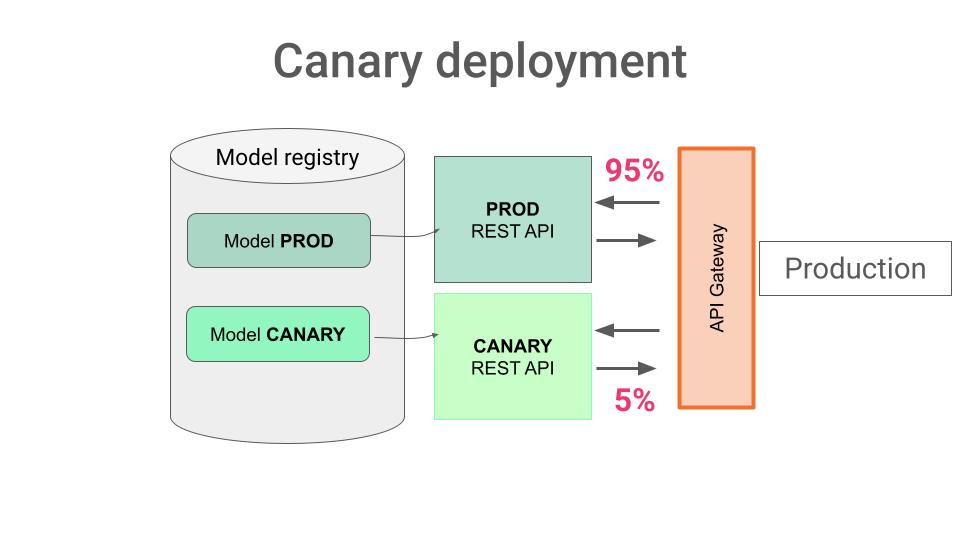
Finally, the most reliable (but potentially dangerous) way to test your ML system is to actually use it in production, for a small percentage of requests.
There are several techniques to do so, including:
A/B tests
Shadow deployments, or
Canary deployments
In any case, you need to have an API Gateway (which for sure Uber has :-)) that can randomly route every incoming request to one of the models, either
the base model that was already running in production, and
the test model that you want to evaluate in a 100% real-world setting.
You need to monitor the performance of each model, compare it, and conclude wheter your new model deserves to be promoted to production.
Wanna get more hands-on MLOps lectures?
→ Subscribe for FREE to the Real-World ML Youtube channel, and access more free lecture like this.
That is all for today.
Talk to you next week.
Enjoy the ride
Pau


> Run unit tests, for example, to make sure you feature engineering functions work as expected. For that, you can use a library like pytest
Should we create unit test for all functions?
Do you have any best practices for writing unit tests? AFAIK, this is a common practice in Software Engineering but not in MLE
> Runs the training script from your “new_eta_model” branch and generates the model artifact
This is interesting, I am using github action for CI. The github action has its own server specification to run the CI. I wonder if we can train a model in seperate machine so that GH action server is not heavy to train model